L'installation d'un système de caméra de bord avec caméras avant et arrière est un excellent moyen de renforcer la sécurité de votre véhicule et de documenter vos trajets. Ce guide vous accompagnera tout au long du processus, du choix de l'équipement approprié à la configuration finale et aux tests. Que vous souhaitiez immortaliser des routes panoramiques ou fournir des preuves en cas d'incident, un système de caméra de bord bien installé peut être un ajout inestimable à votre voiture.
Points Clés
- Assurez-vous de la compatibilité avec votre véhicule et choisissez un modèle de caméra de bord qui répond à vos besoins, ainsi que les outils d'installation et accessoires nécessaires comme les attaches velcro.
- Préparez l'installation en comprenant le processus, ...
Partager:
Le Vantrue N4Pro a été présenté sur Saburogu !
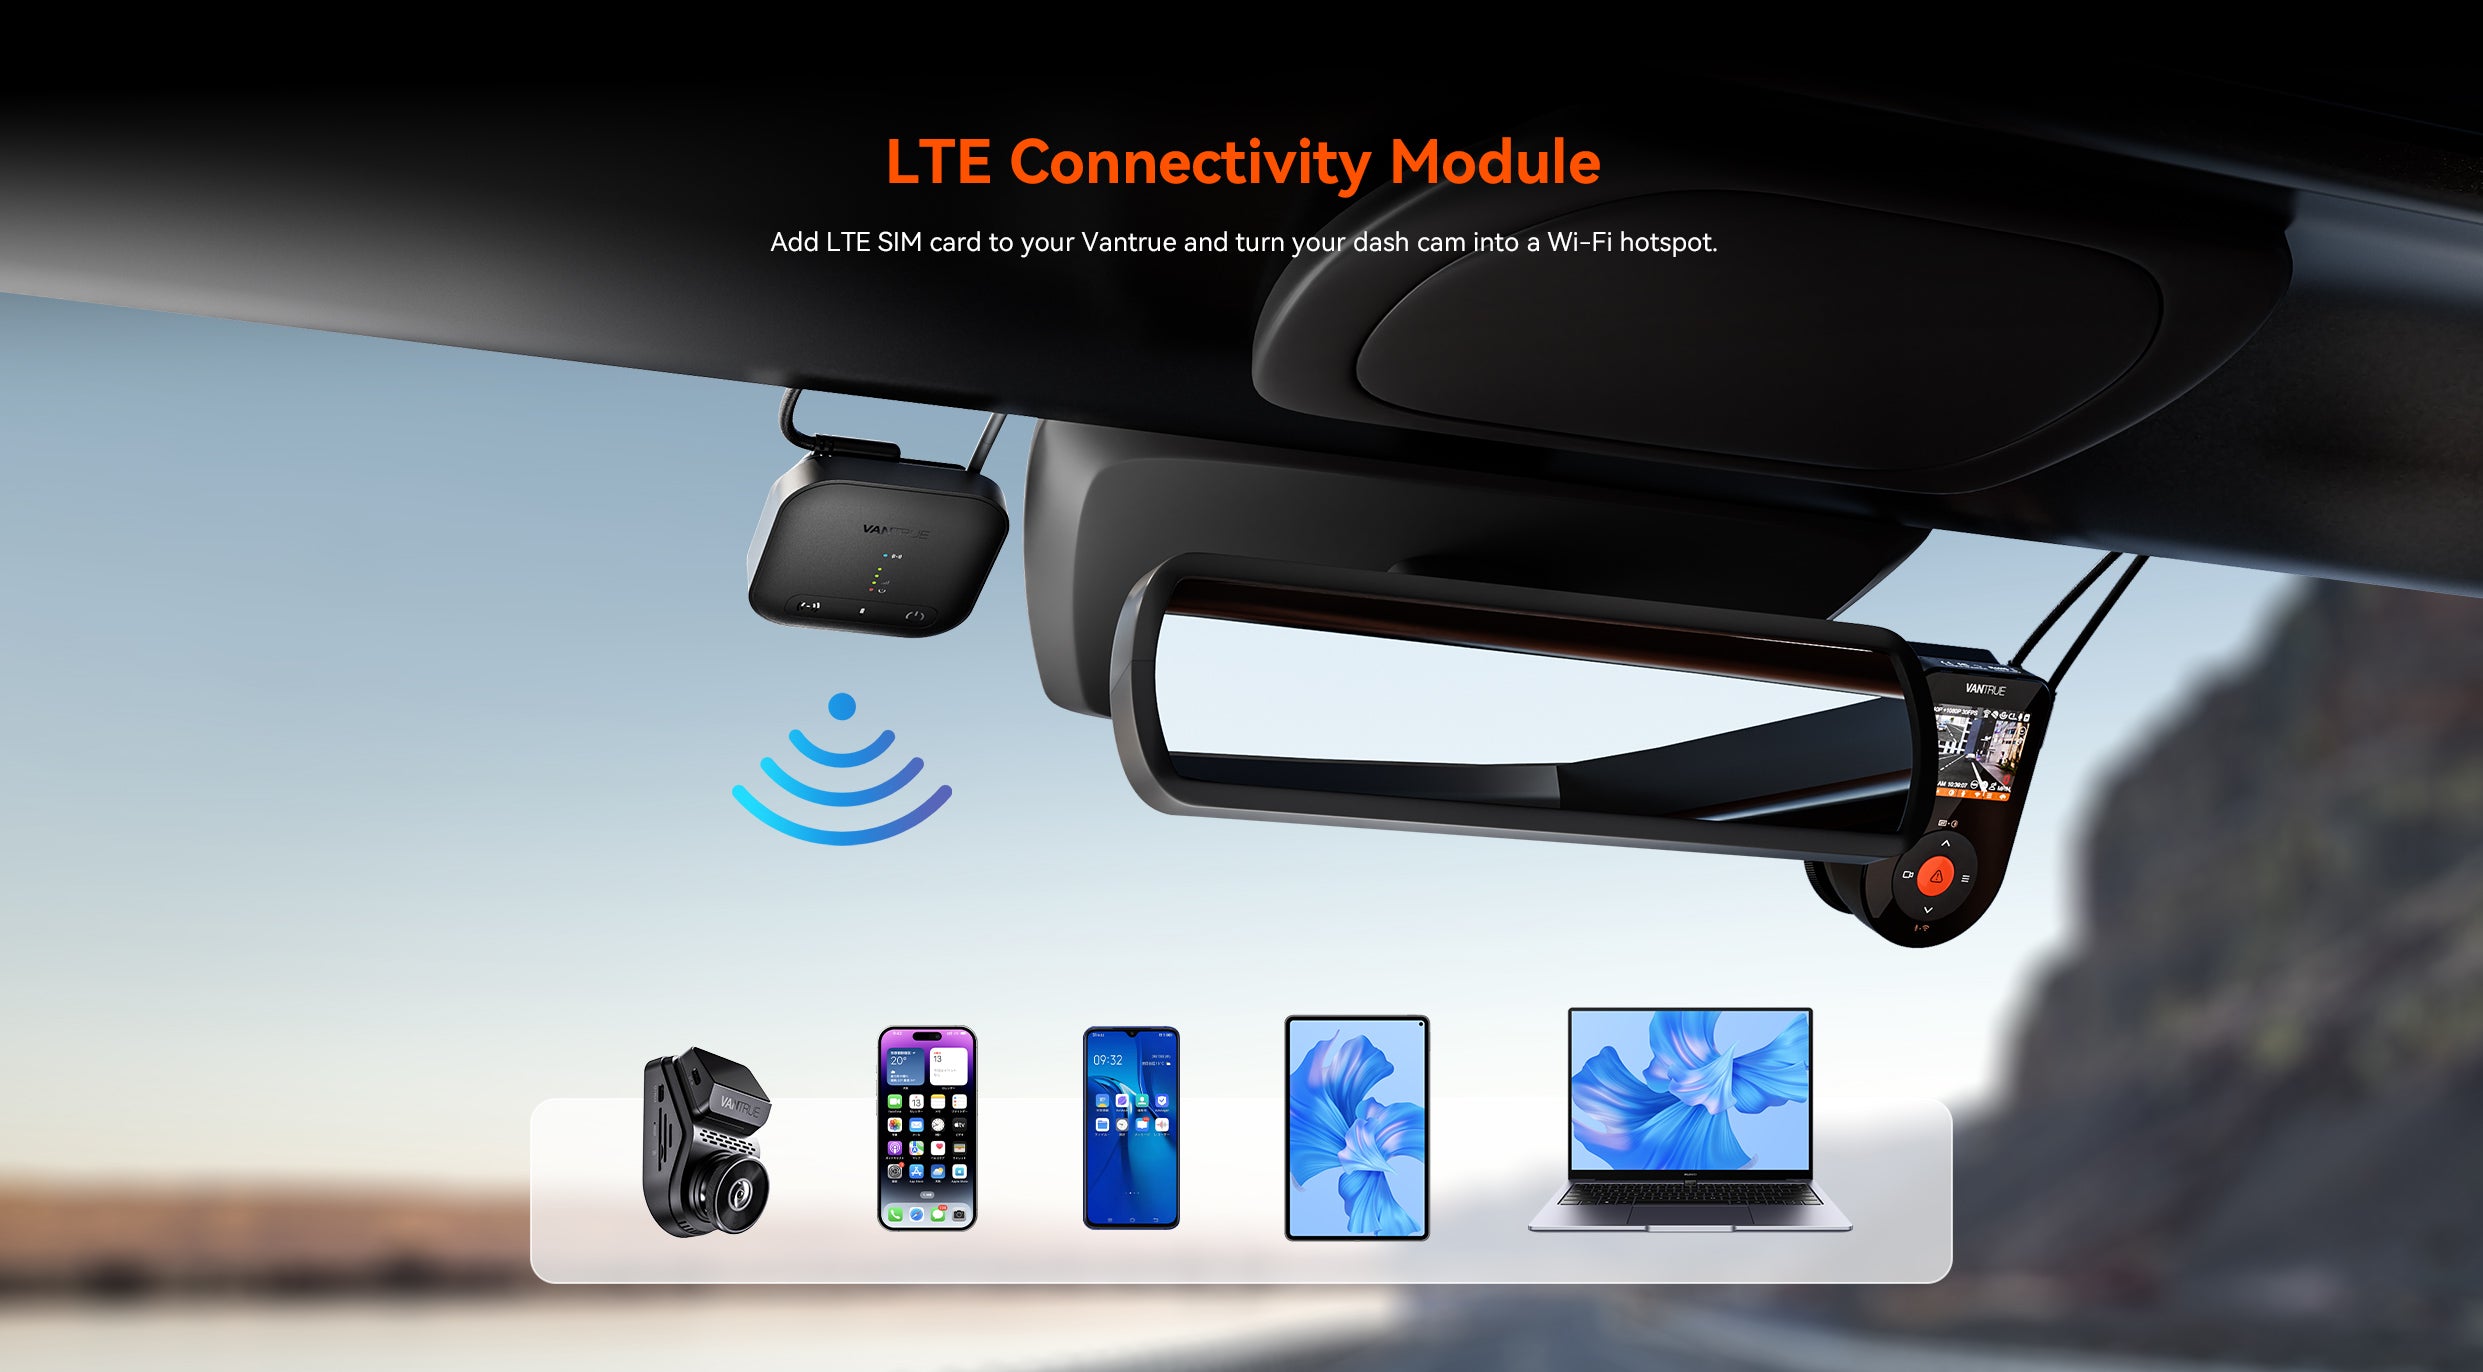
Les 6 avantages des dashcams avec LTE : pourquoi elles changent la donne pour les conducteurs
3 commentaires
Dansk instruktionsbog til Visual Smart drive hvis det er muligt at dovnloade den
Jeg vil gerne have en dansk vejledning til et Visual smart drive jeg har købt men jeg er ikke så god til fremmet sprog
How do i change the language?